
Building a Clothing Rack
Anytime I saw a clothing rack on Pinterest, I thought to myself, “How cute but impractical”. I mean, who actually has a neatly styled rack of clothes in their room? And where are the rest of their clothes hiding?
Then, I created a capsule wardrobe.
I decluttered my clothing to just 50 items for all four seasons. After curating a simple cohesive wardrobe in our small bedroom with very little closet space, suddenly the clothing rack made complete sense!
The Search Began
I spent a while searching for the perfect clothing rack for my capsule wardrobe. The ones I liked had higher price tags ranging from $80-325. I was picturing a wooden base with iron poles, no additional shelving, and I wanted it to be tall enough for maxi dresses. There was also the $20 IKEA one, which if you know me, was a very tempting deal. But, it wasn’t the style I wanted.
Here are some of the ones that I liked and considered buying before deciding to make my own…
Wood & Wire Garment Rack - Target $150
Raybee Clothes Rack - Amazon $80
Vasagle Clothes Rack - Amazon $80
Rolanstar Garmet Clothing Rack - Amazon $65
Jotsport Bamboo Clothing Rack - Amazon $68
Simple Housewares Industrial Pipe Clothing Rack - Amazon $40
Mine is probably most similar to this beauty from West Elm for $325.
I ended up deciding to build my own, in hopes that it would be more cost effective. In the end, I probably spent $90, excluding the cost of the wooden base. Because lucky for me, my husband made a desk a few years back whose tabletop was the perfect length and width for this project. I repurposed the desk for the base of my clothing rack.
Building My Own Clothing Rack
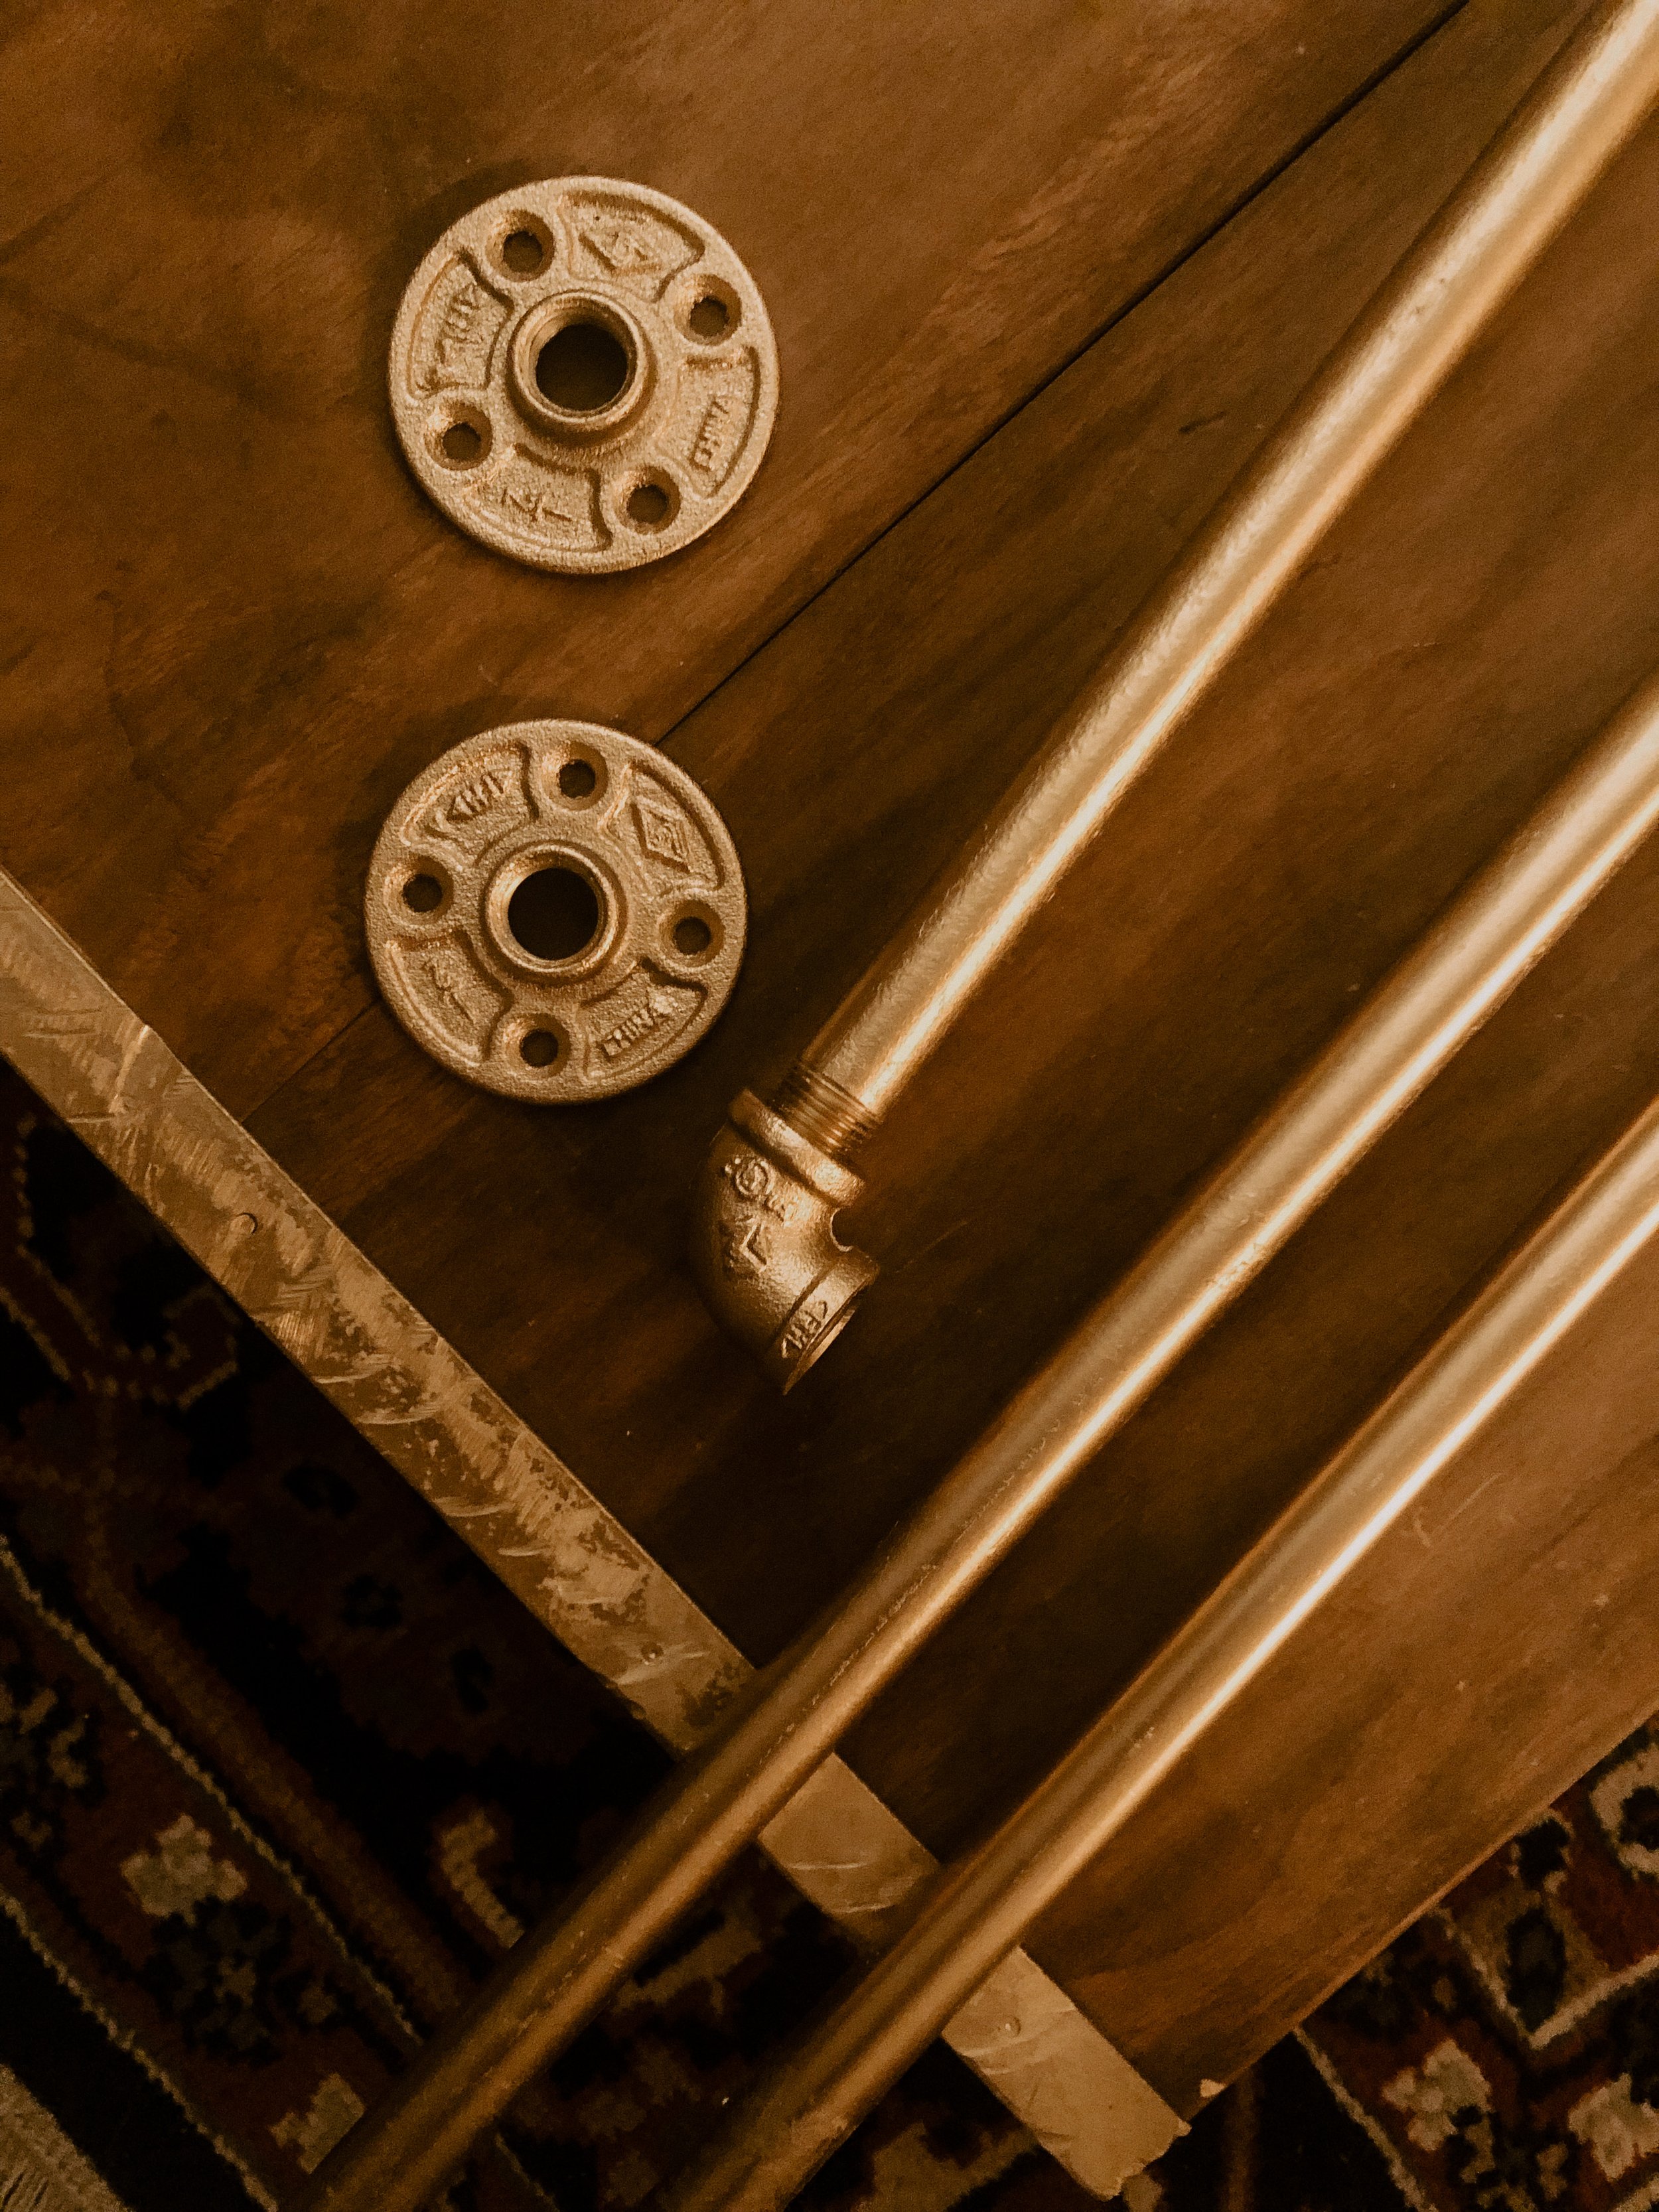
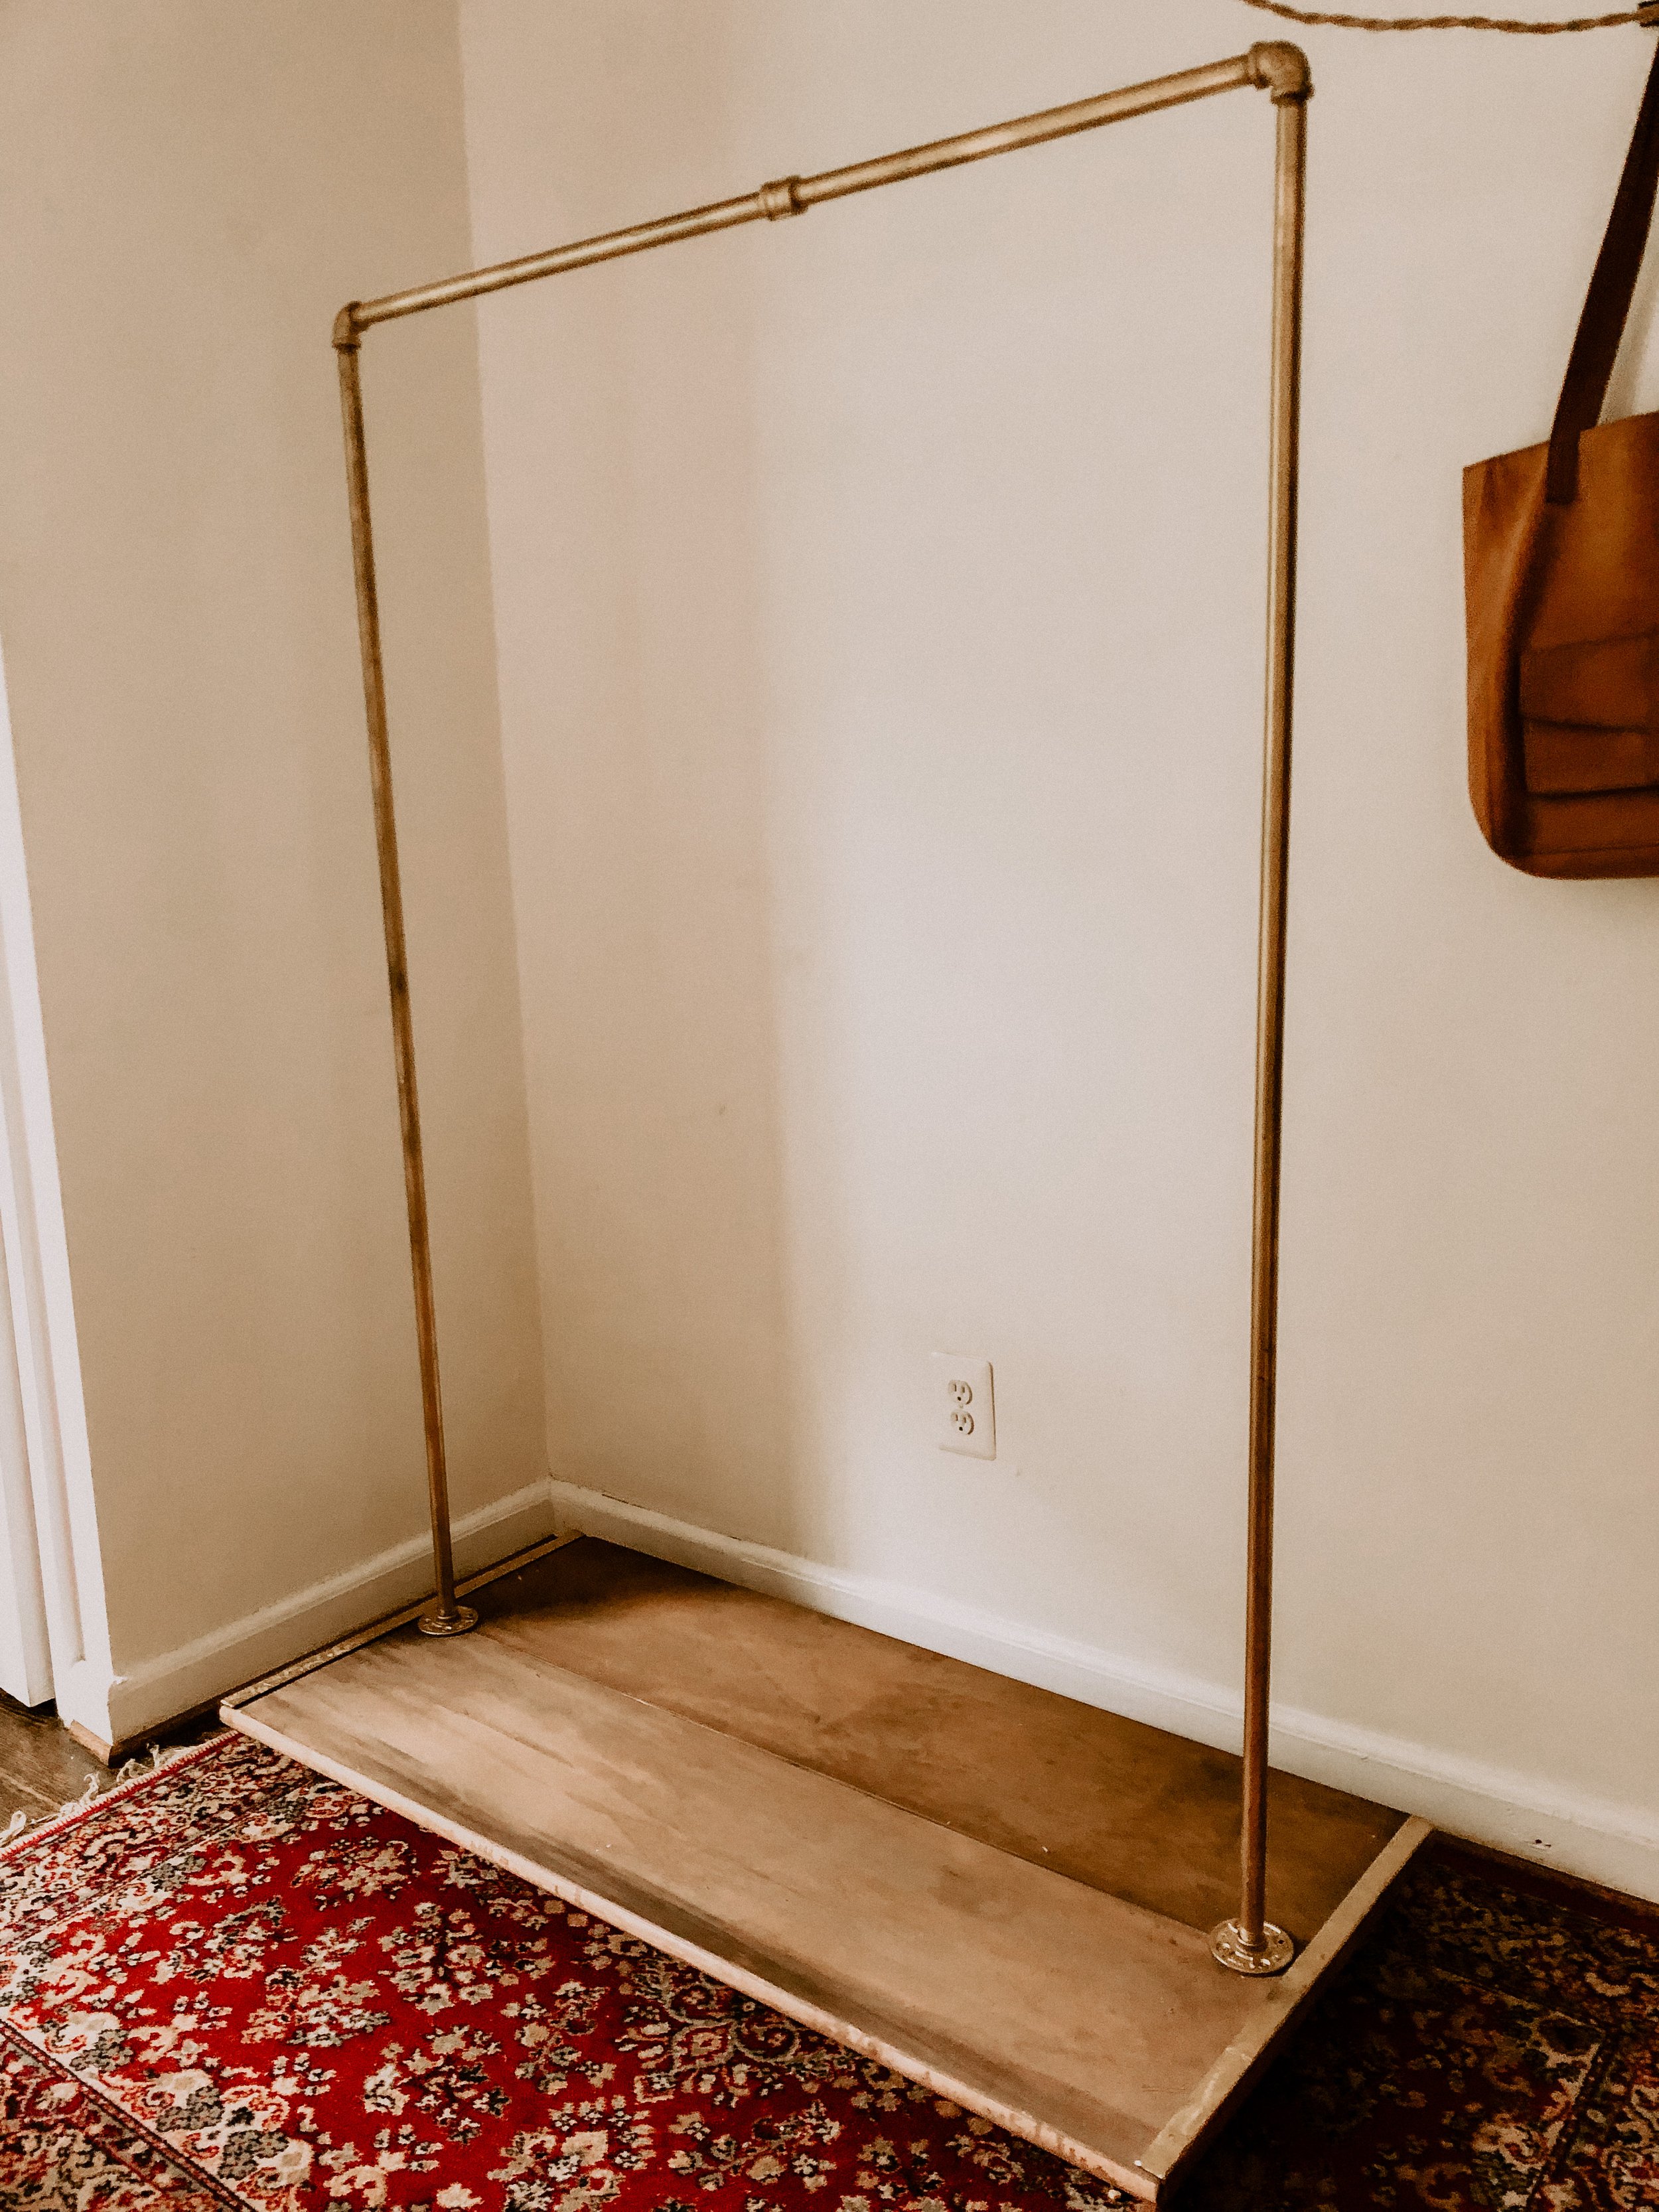
I went to Home Depot and bought ½” iron pipes (2 - 60” pipes, 1- 48” pipe, 2- elbow fittings, 2-base flanges) and 1” wood screws. I found some cute wheels on Amazon for the base. And I decided to spray paint everything gold.
Building it is pretty self-explanatory. Attach the wheels to the wooden platform first. Screw all the pipes together and then secure the base flanges (connected to the rack pipes) to the wooden platform. My one tip when screwing the pipes together is to work from the top-down. In other words, add the elbows to the top bar, then add in the “legs” to those elbows, then add the base flanges, and lastly screw the whole thing into the wooden platform.
Overall, this project was easy, not the most affordable option, BUT it is better quality than the racks in a similar price range. Buying a clothing rack would have saved me time but in the end I am happy I chose to build one because turned out to be exactly what I was envisioning. Now, I can’t wait to style it and have my capsule wardrobe on display in my room.
Watch me put it all together on Instagram!
