
How to Add a Water Pump to a Mud Kitchen
It had been a really long day but it was only the afternoon. You know, that point in the day where you are tuckered out with the kids, getting dinner together, and aware that it would still be a few more hours before the husband would be home to help? That “last stretch” of the day kind of feeling…
Do you ever struggle with that time of the day? Or find you and your kids need a little reset in the day to turn it around?
When I got to this place, I posted on the Holy Homemaking Group, my Facebook community, asking for any tips. A sweet mother and friend of mine responded with this simple but amazing advice,
“Just add water.”
Whenever kids and mom need a little reset, just add water.
Maybe that means putting them in the bathtub, letting them play in the kitchen sink, giving them a spray bottle and wash cloth, or getting out the hose. I’ve found many creative ways to let them play with water. Whatever the case, it’s simple. Just add water and it can turn everyone’s mood around. It has helped us on so many days.
And now, we have a mud kitchen outside with water flowing whenever the kids want it!
GAME CHANGER.
On this blog post, I share this simple how to DIY project with you. It is made extremely easy with the right products. After some searching on Amazon, I found an affordable way to give my kids a working water pump! Go to the links I’ve shared in this post and you can have a water pump set up by tomorrow whether you have a mud kitchen or not.

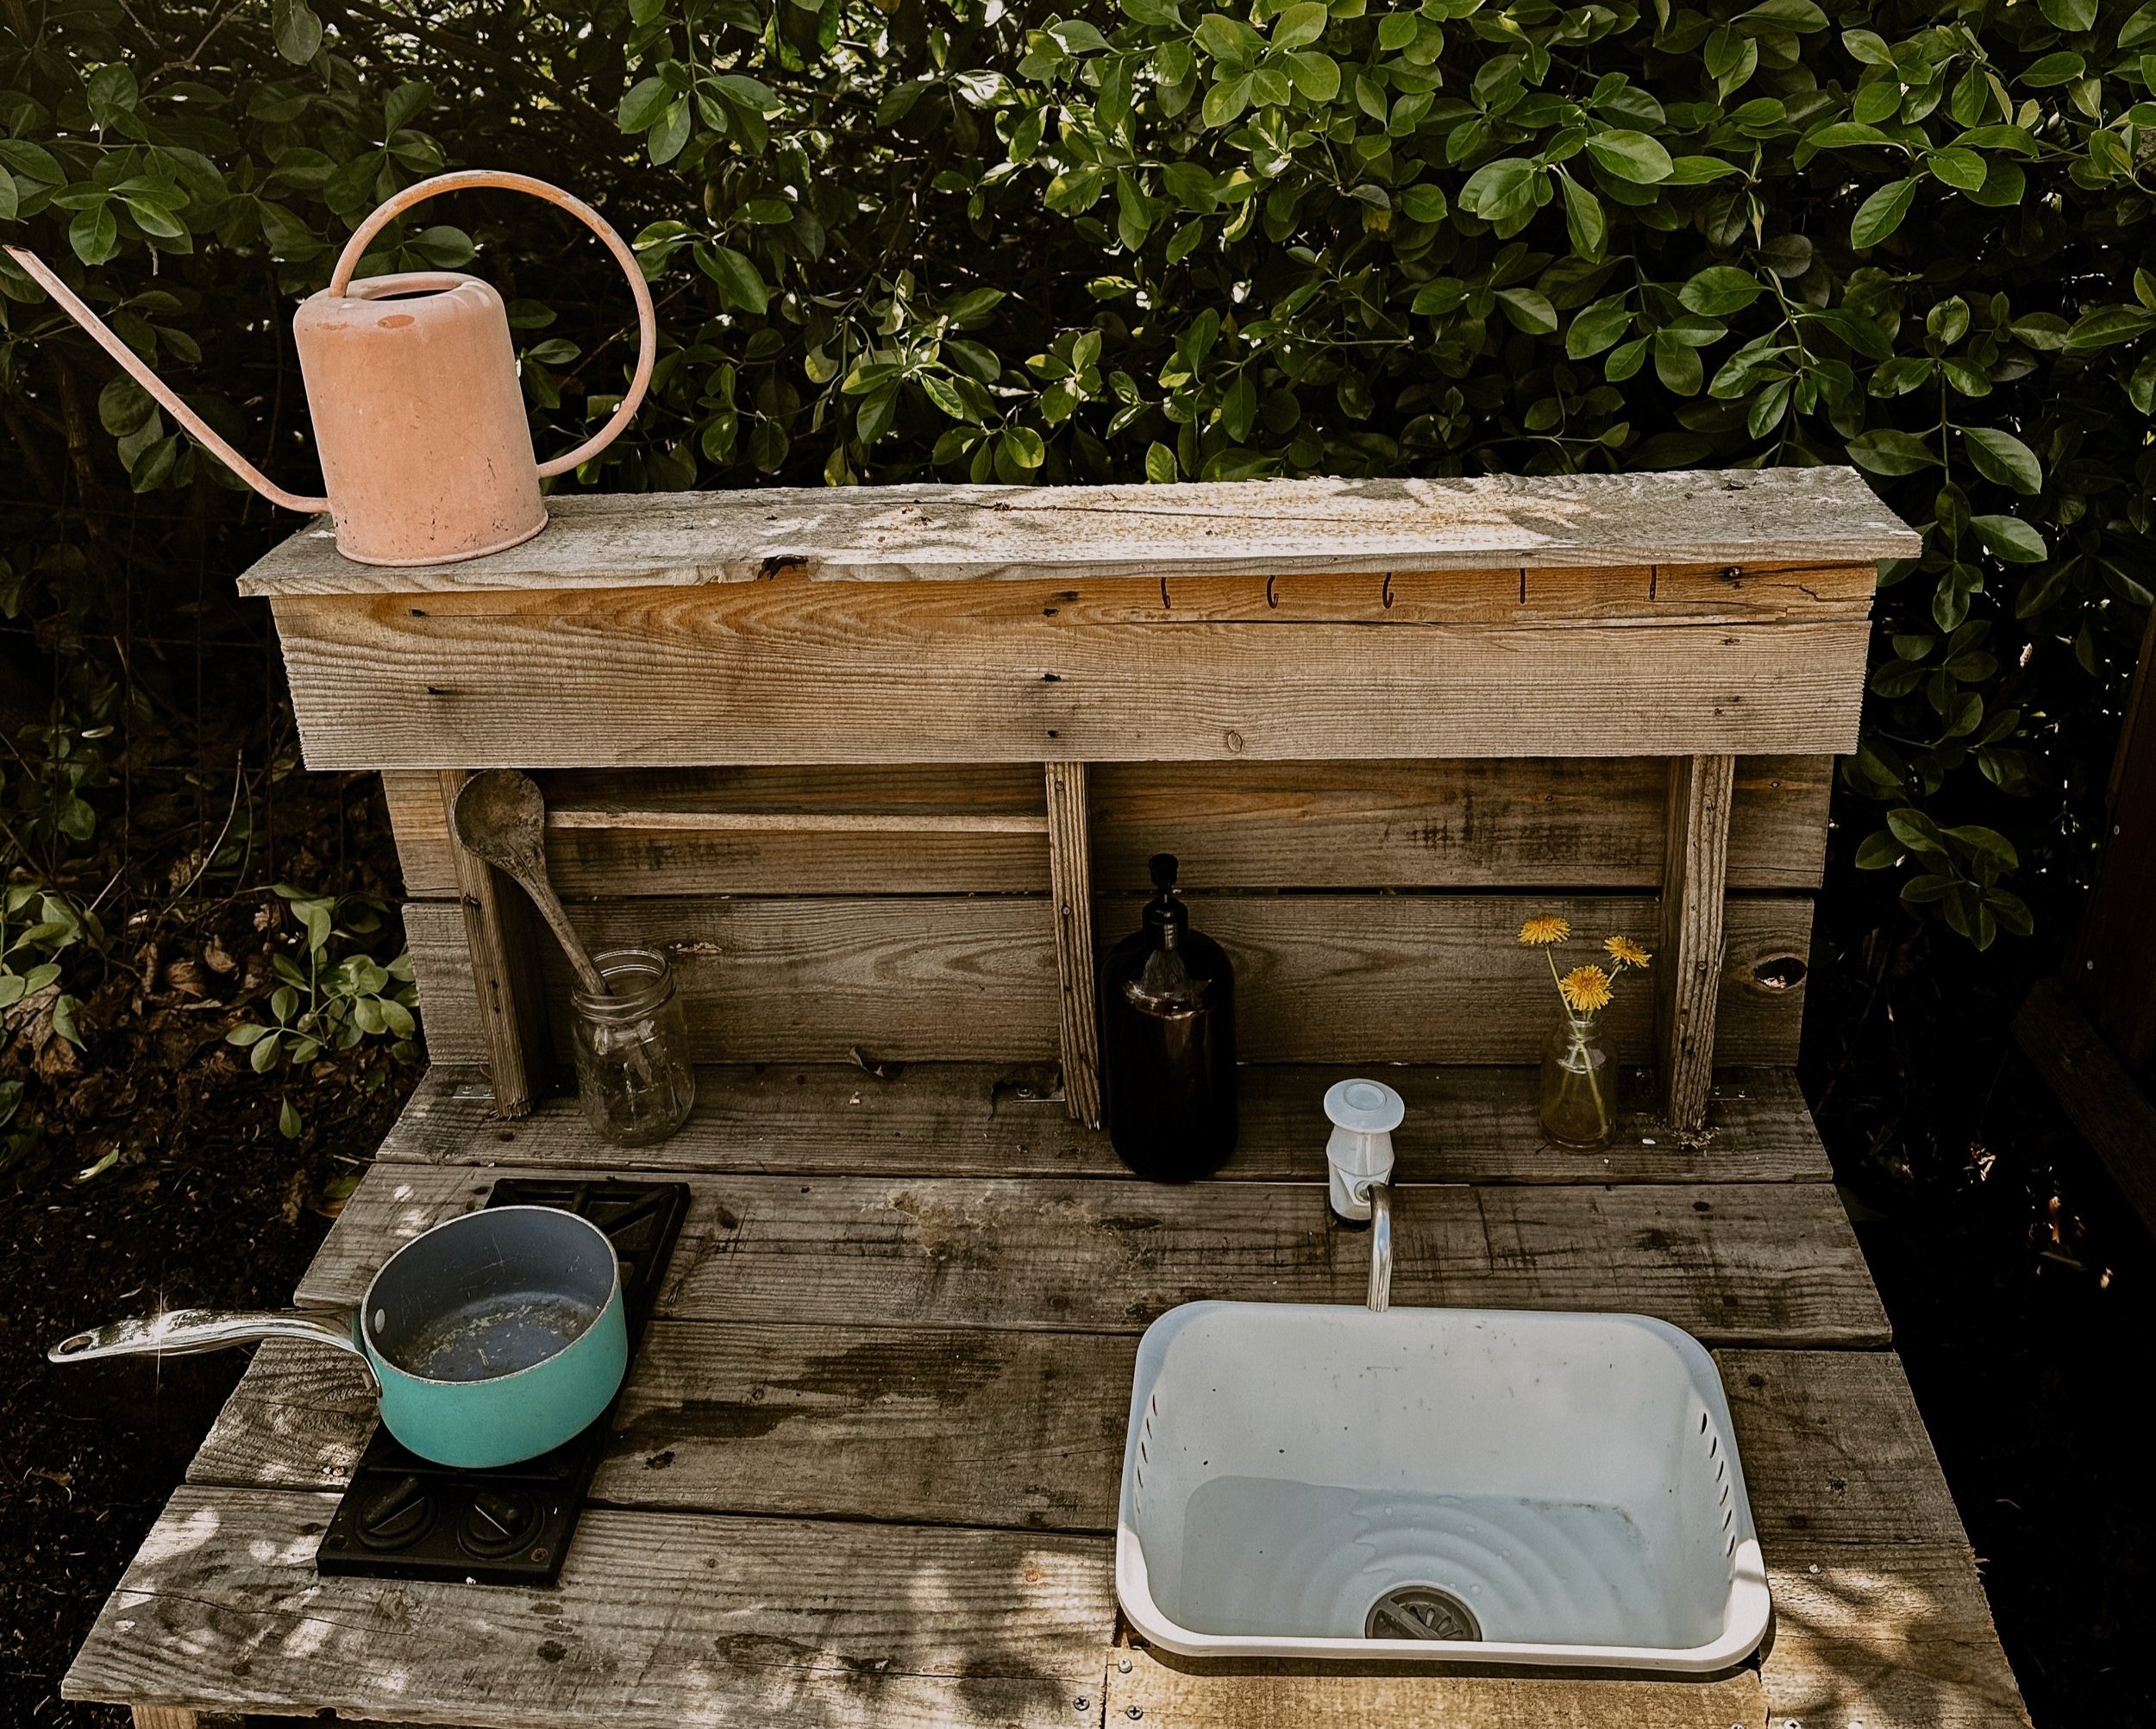
A Mud Kitchen with a Working Water Pump
I wrote this specifically for mud kitchens, however, you could tailor it to work for an indoor play kitchen, or in a few simple steps you could make a working water pump without any kitchen at all! If you would like to make a mud kitchen, I had a tutorial for that too!

I made this mud kitchen for free with scrap wood and a pallet of wood. Visit this previous blog post to get a step by step tutorial. As you can see we were using a water jug for water, naturally it broke and needed to be refilled constantly so now, I have found a way to make the mud kitchen functional with a working water pump.
Keep reading!
The Supplies
This is what you will need:
Water Pump with tubing
Water Receptacle (I highly suggest a 5 gallon water jug, which I found for free)
A Sink Basin (this is not needed if you are just making a water pump without a kitchen, but if you are putting this in the kitchen, this is the BEST sink basin for the task!
And of course, if you are fixing this into a mud kitchen or play kitchen, you will need some power tools, a jigsaw will make the job easiest but you can find other ways.
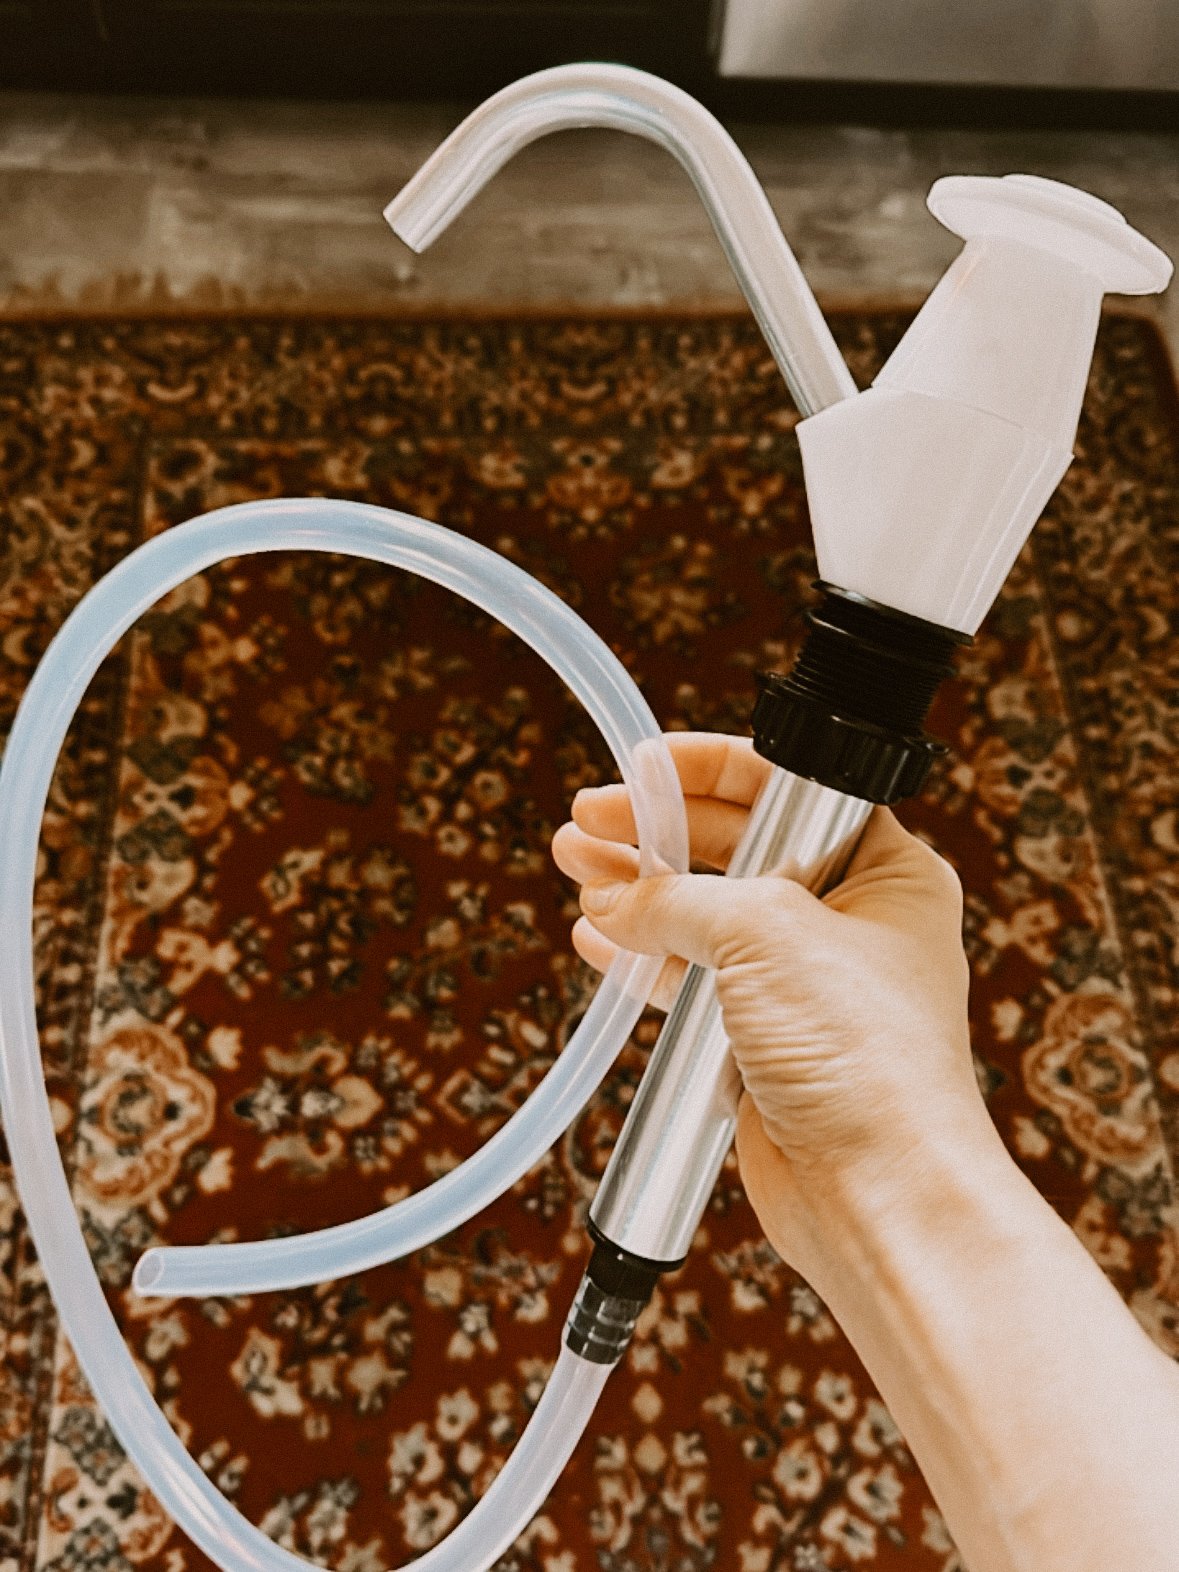
I had been looking for a water pump to add to this play kitchen for a while. It’s hard to find ones that are not electric, battery powered and in need of charging. I wanted a manual pump that could weather outdoors and that my kids could use without pushing a button on and off and I found one!! This one is PERFECT. It did not come with tubing but I found some that was the perfect fit for this pump!
I found this silicone tubing that fit like a glove on the pump. Get the 10mm x13mm option. Attach this to the pump and you are almost ready to go! Do not cut the tubing yet, wait to see how much length you need at the end.
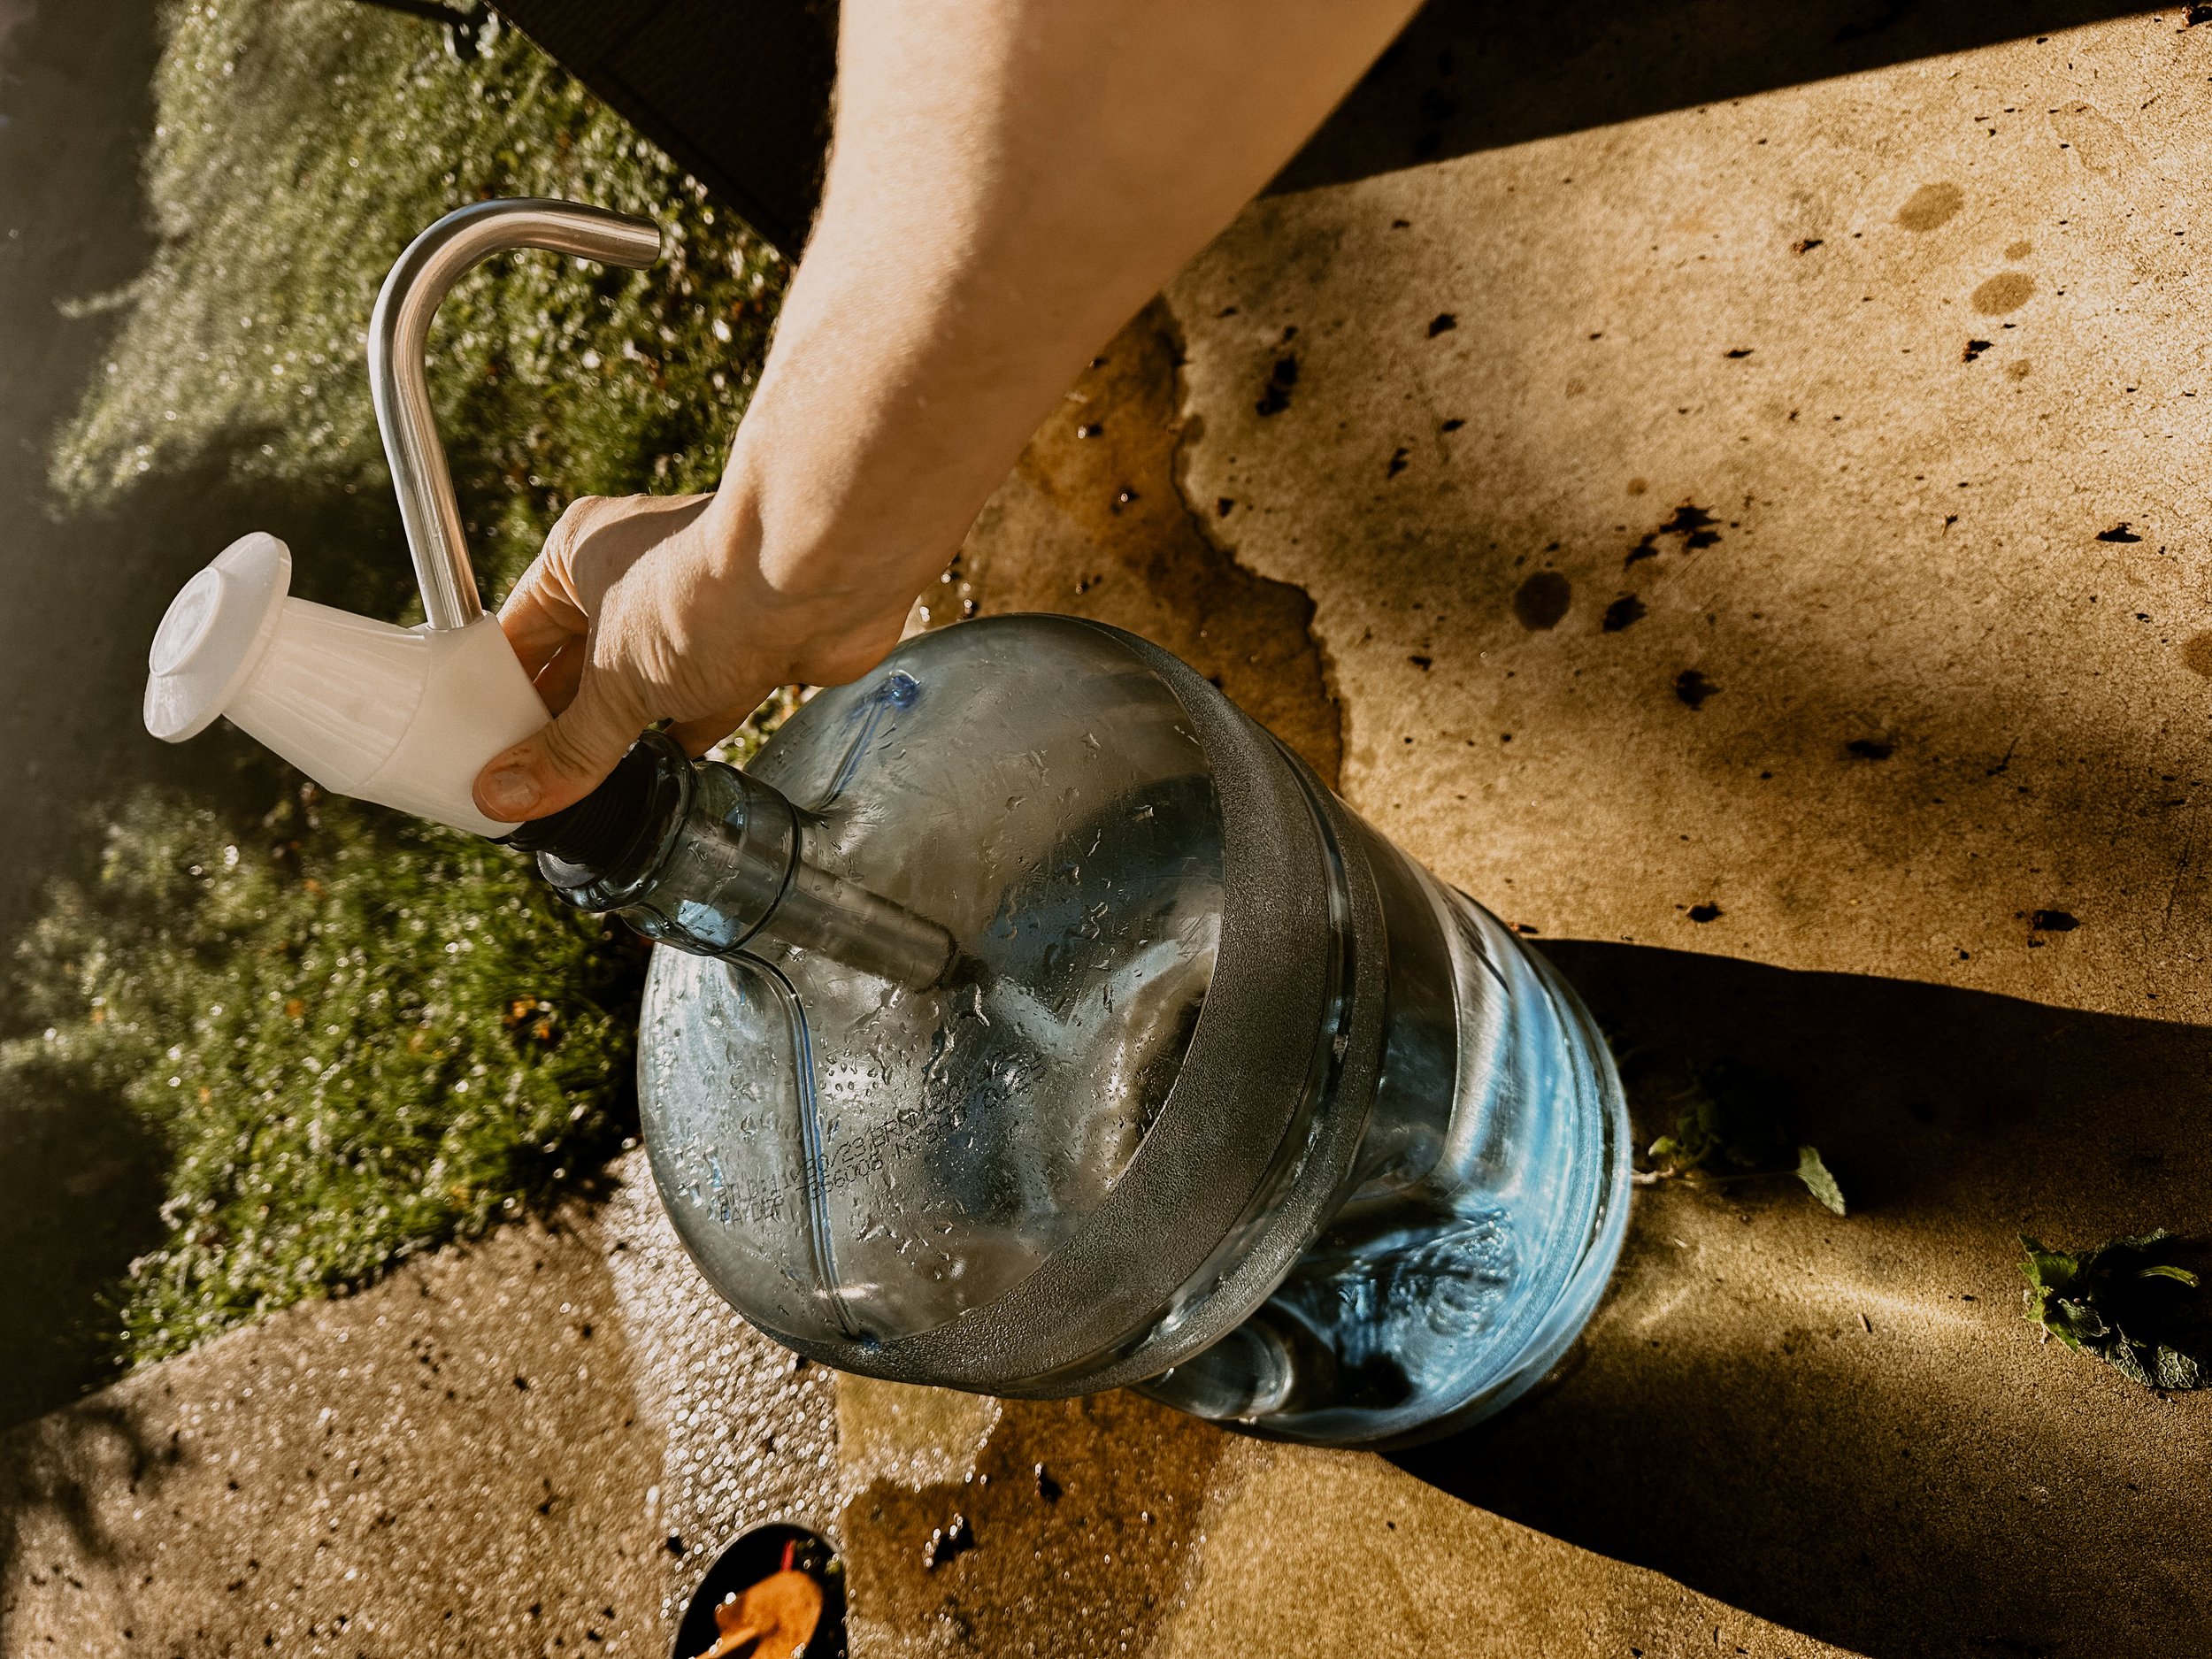
5 GALLON WATER JUG/OTHER LARGE RECEPTACLE
The water pump fits perfectly on top of a 5 gallon water jug which I was able to get free from a neighbor. The 5 gallon water jug is ideal if you are just wanting to have a working water pump without a mud kitchen. All you need to do is set the pump on top of the water jug and you are ready for fun! See below!
You can get a 5 gallon water jug at some grocery stores or hardware stores and on Amazon though that is not the most affordable option. If you ask around, you can probably find a recycled one for free. You can also use any large water receptacle. For a little while, we had our mud kitchen set up to a large 5 gallon bucket because I did not have a 5 gallon water jug. This works too, you can run the tubing into any large receptacle filled with water. However, you will have be be vigilant in keeping it covered or emptied, where there are open pools of water, you have the potential for a mosquito problem. With the 5 gallon water jug, there is no room for mosquitos to get in and nest. The water pump fits smoothly into the top, and if you do have any open space, you can get a cap for the water jug to fit more tightly on the tubing.
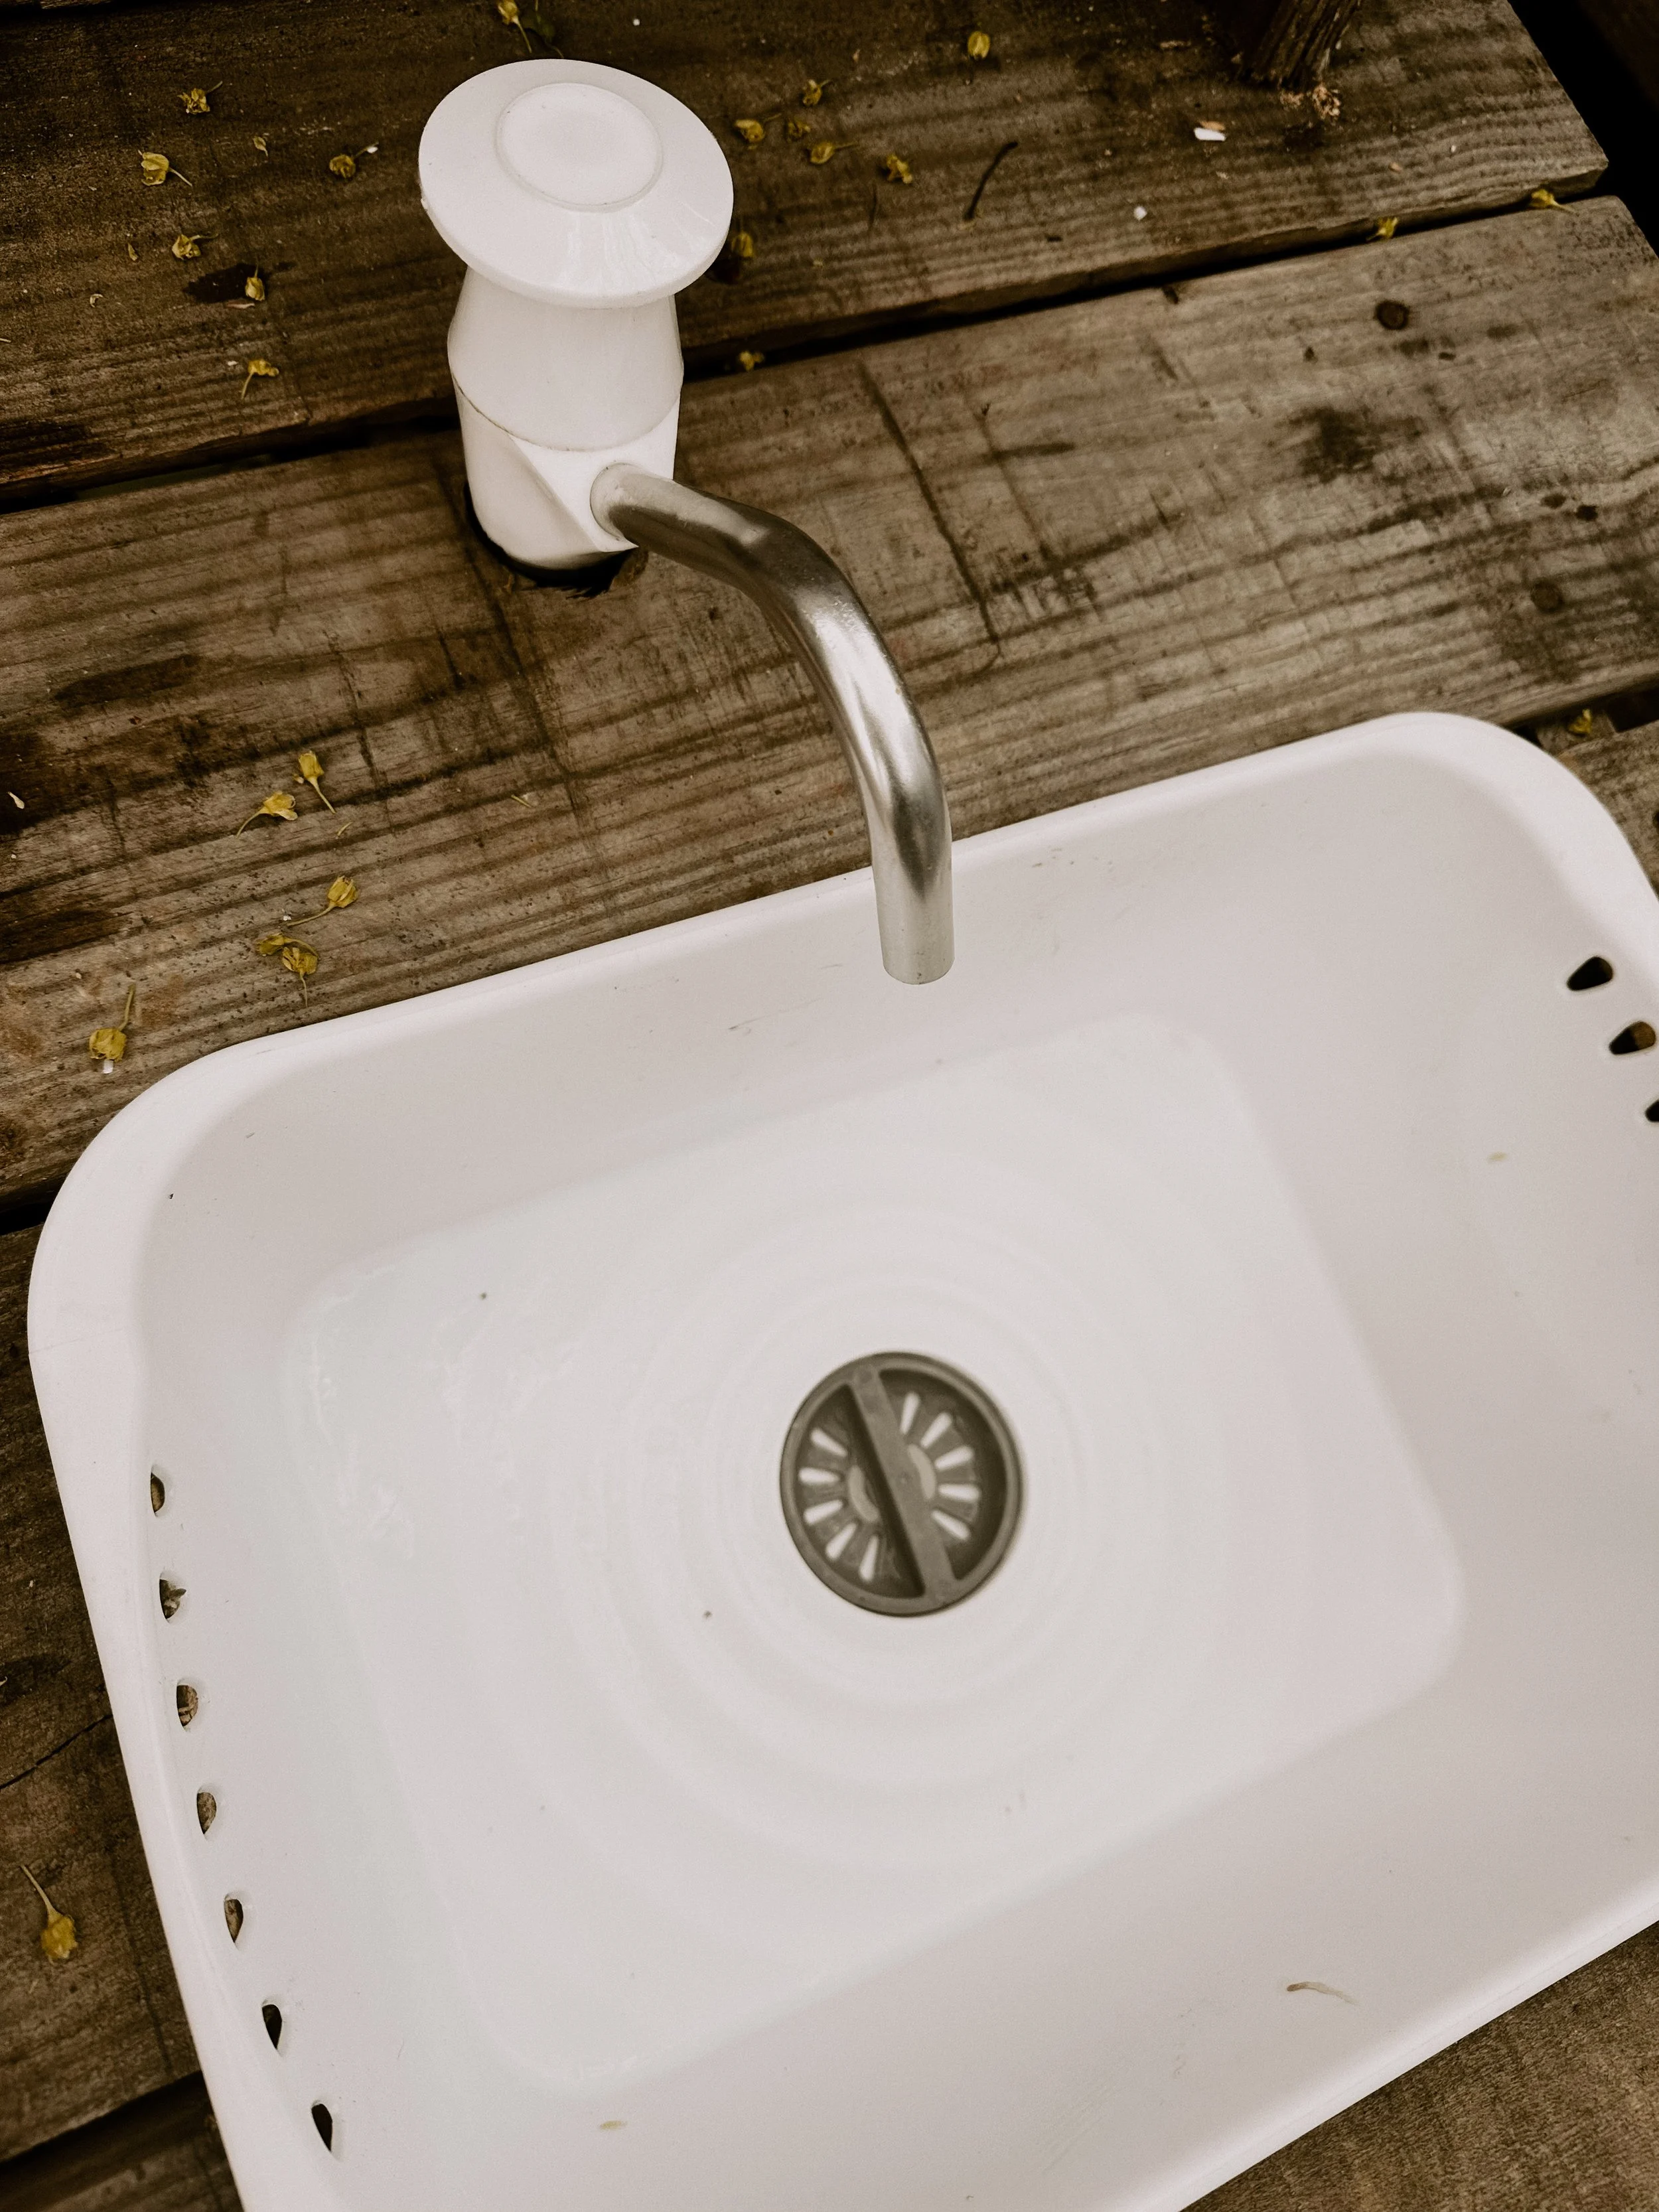
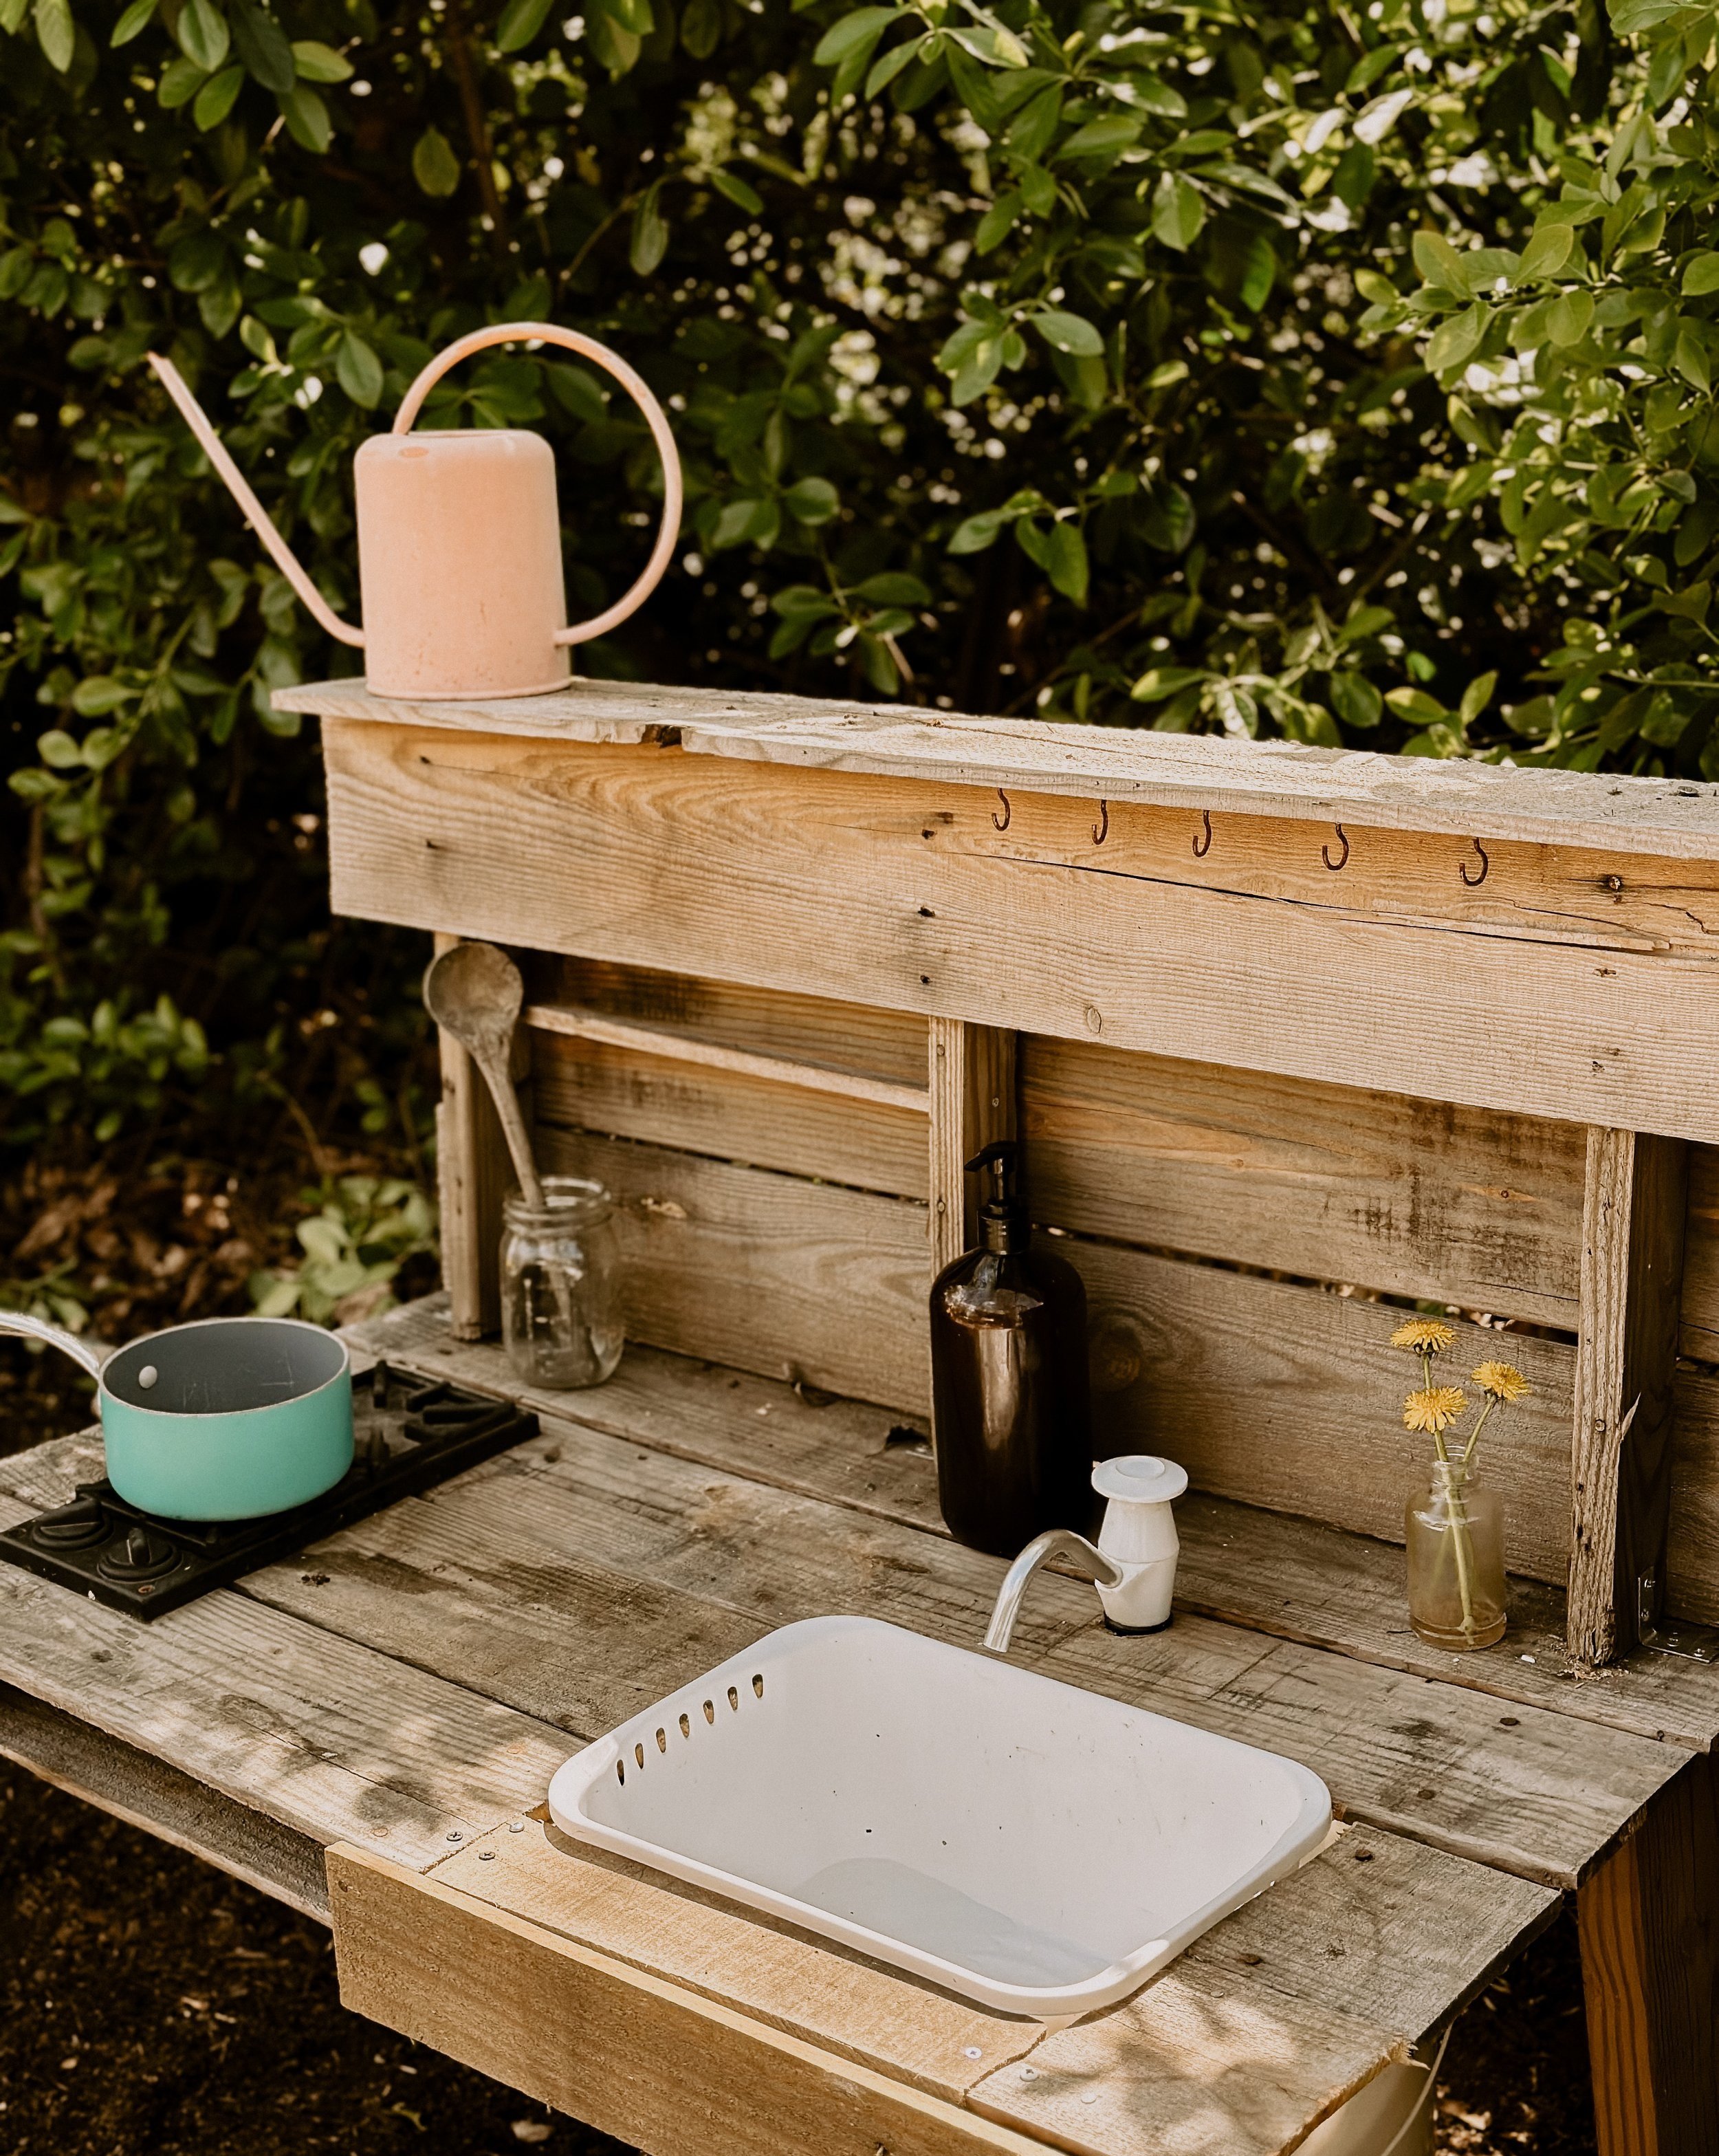
This is the best sink basin. It has a lip around the edge to rest on the mud kitchen and it has a working drain that the kids can plug to make it like a water table or open to let it drain. If you are adding this water pump to an indoor play kitchen, you will want to add a collection receptacle under the sink drain to collect the water. Since I am using this for an outdoor mud kitchen, I am happy to let the water drain onto the ground.
For the sink basin, there are plenty of other options you can use: a big metal mixing bowl or any kind of bowl or plastic basin tub. These things will not have a drainage hole but using a drill bit, you could make some drainage holes. Without a drain, you will want to dump the water when it is full and when play is done. As I mentioned above, sitting water will attract mosquitoes.
Putting It Together
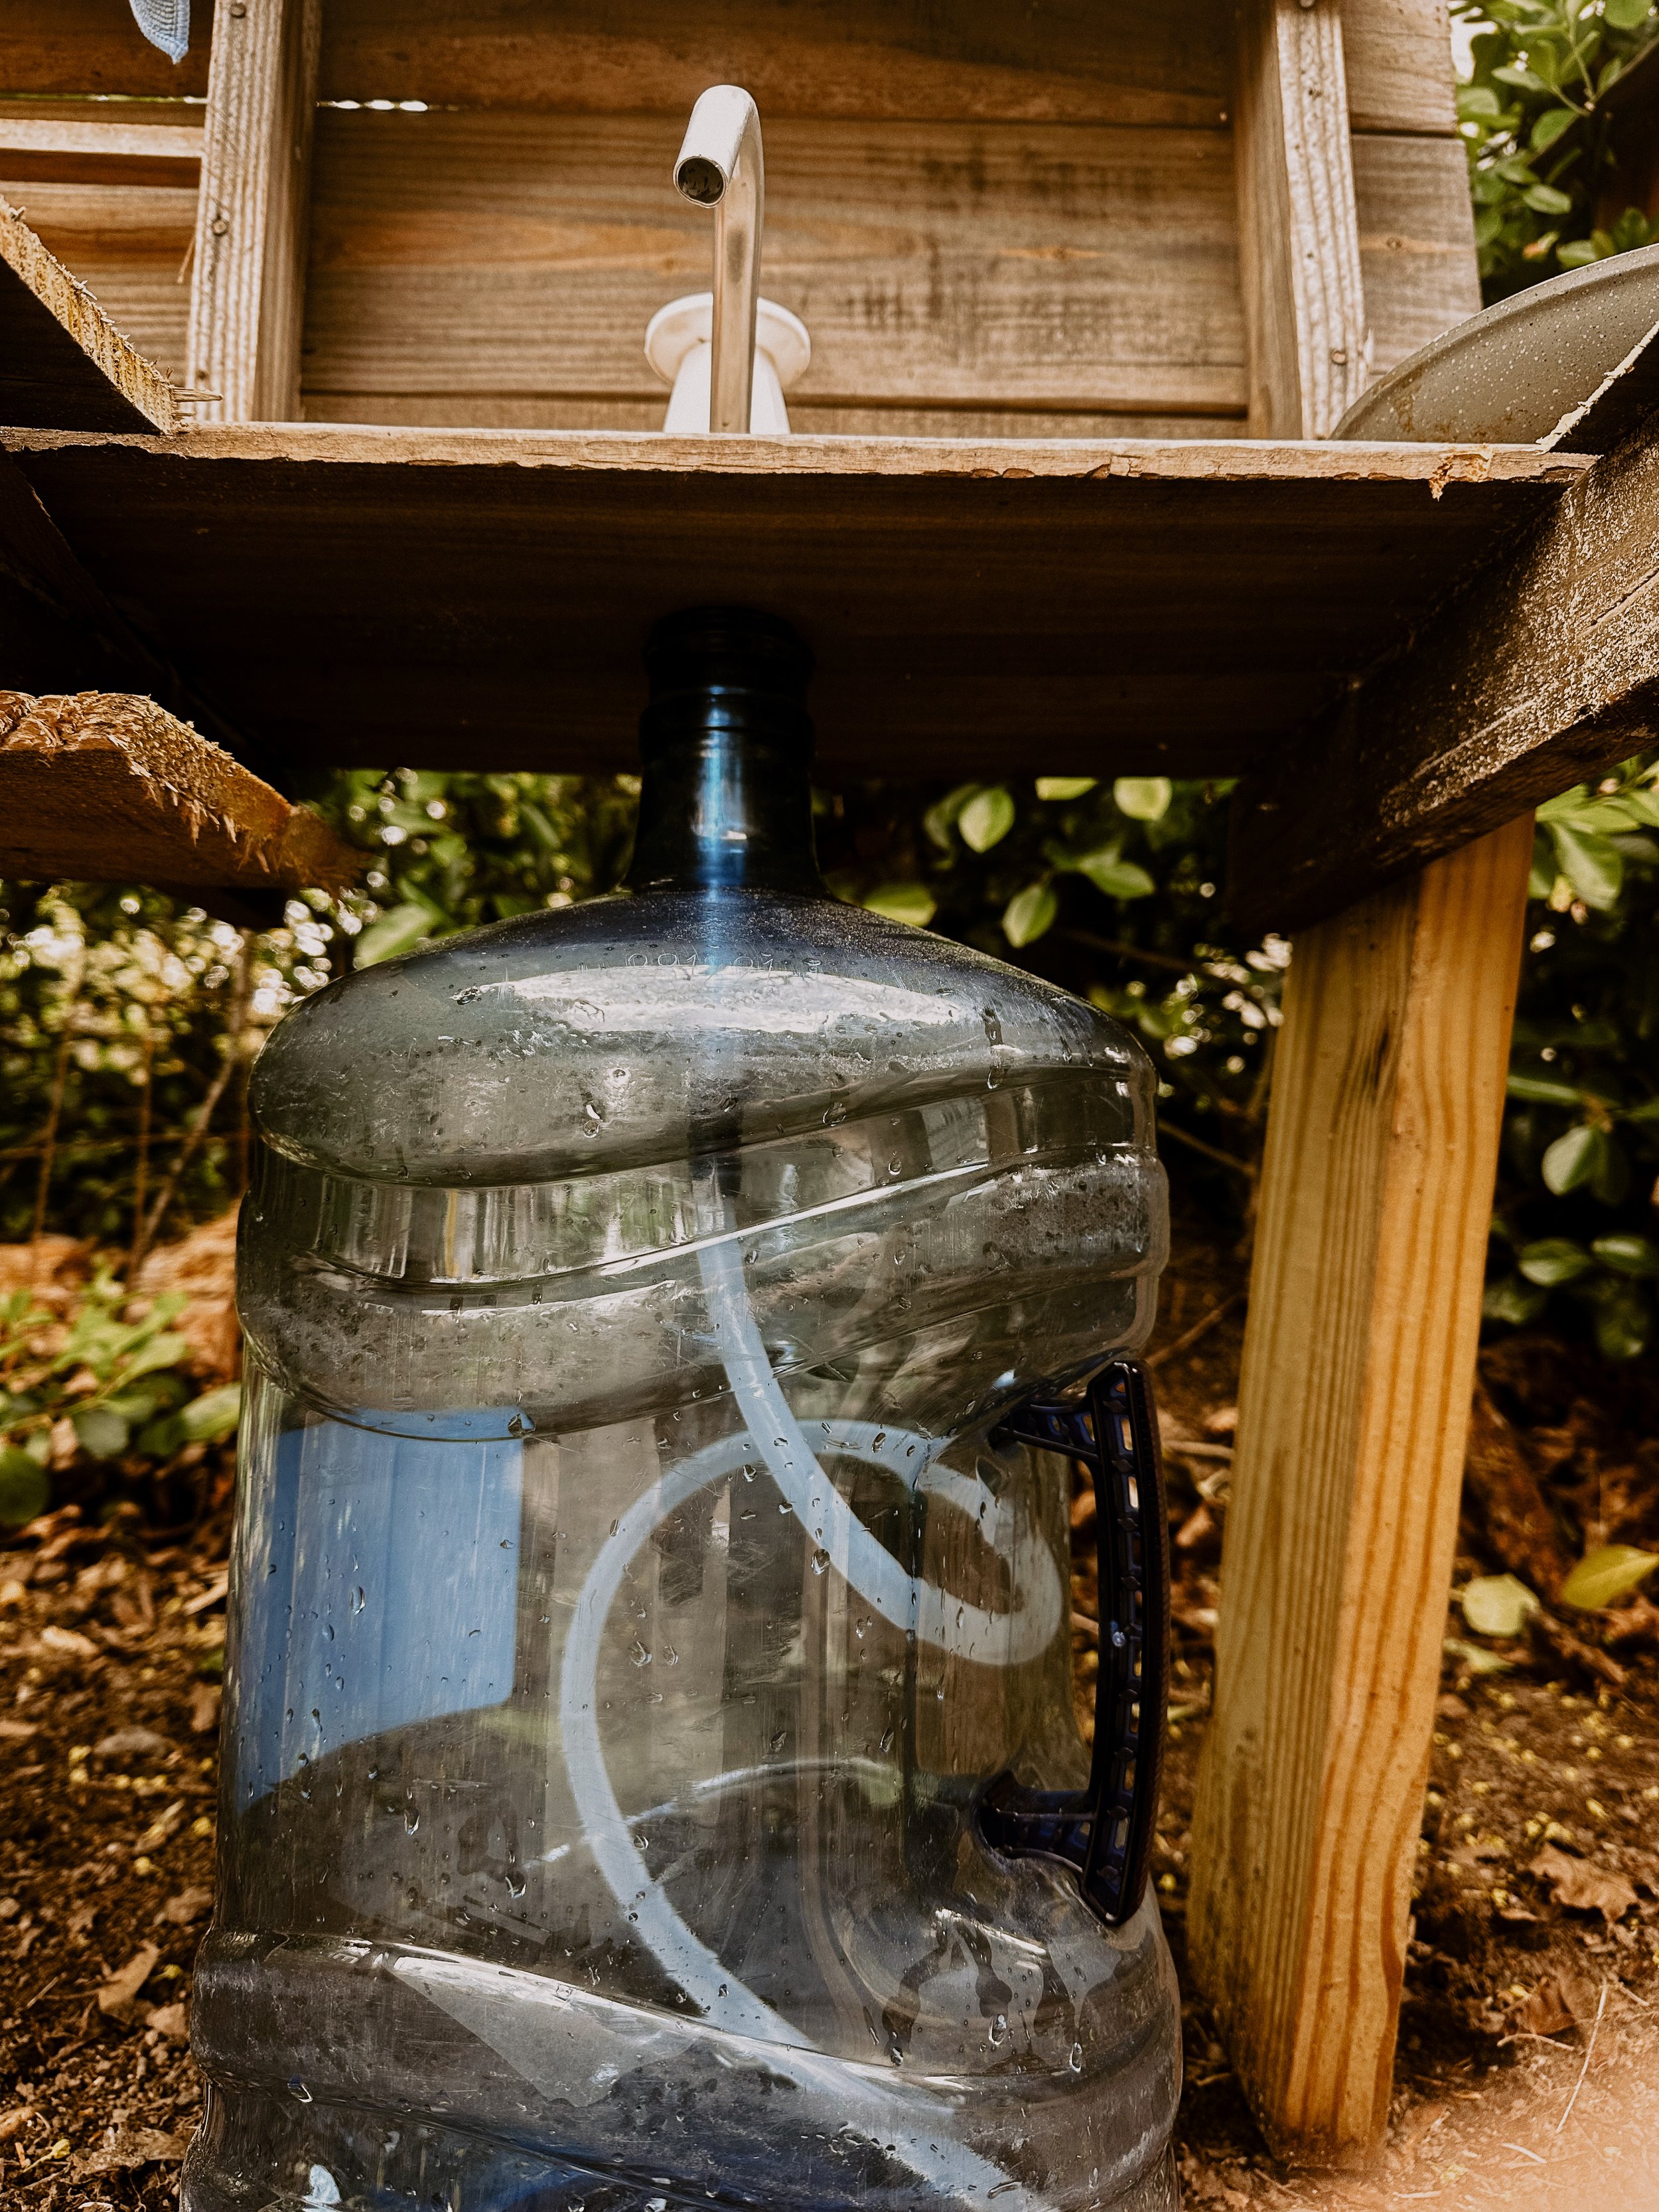
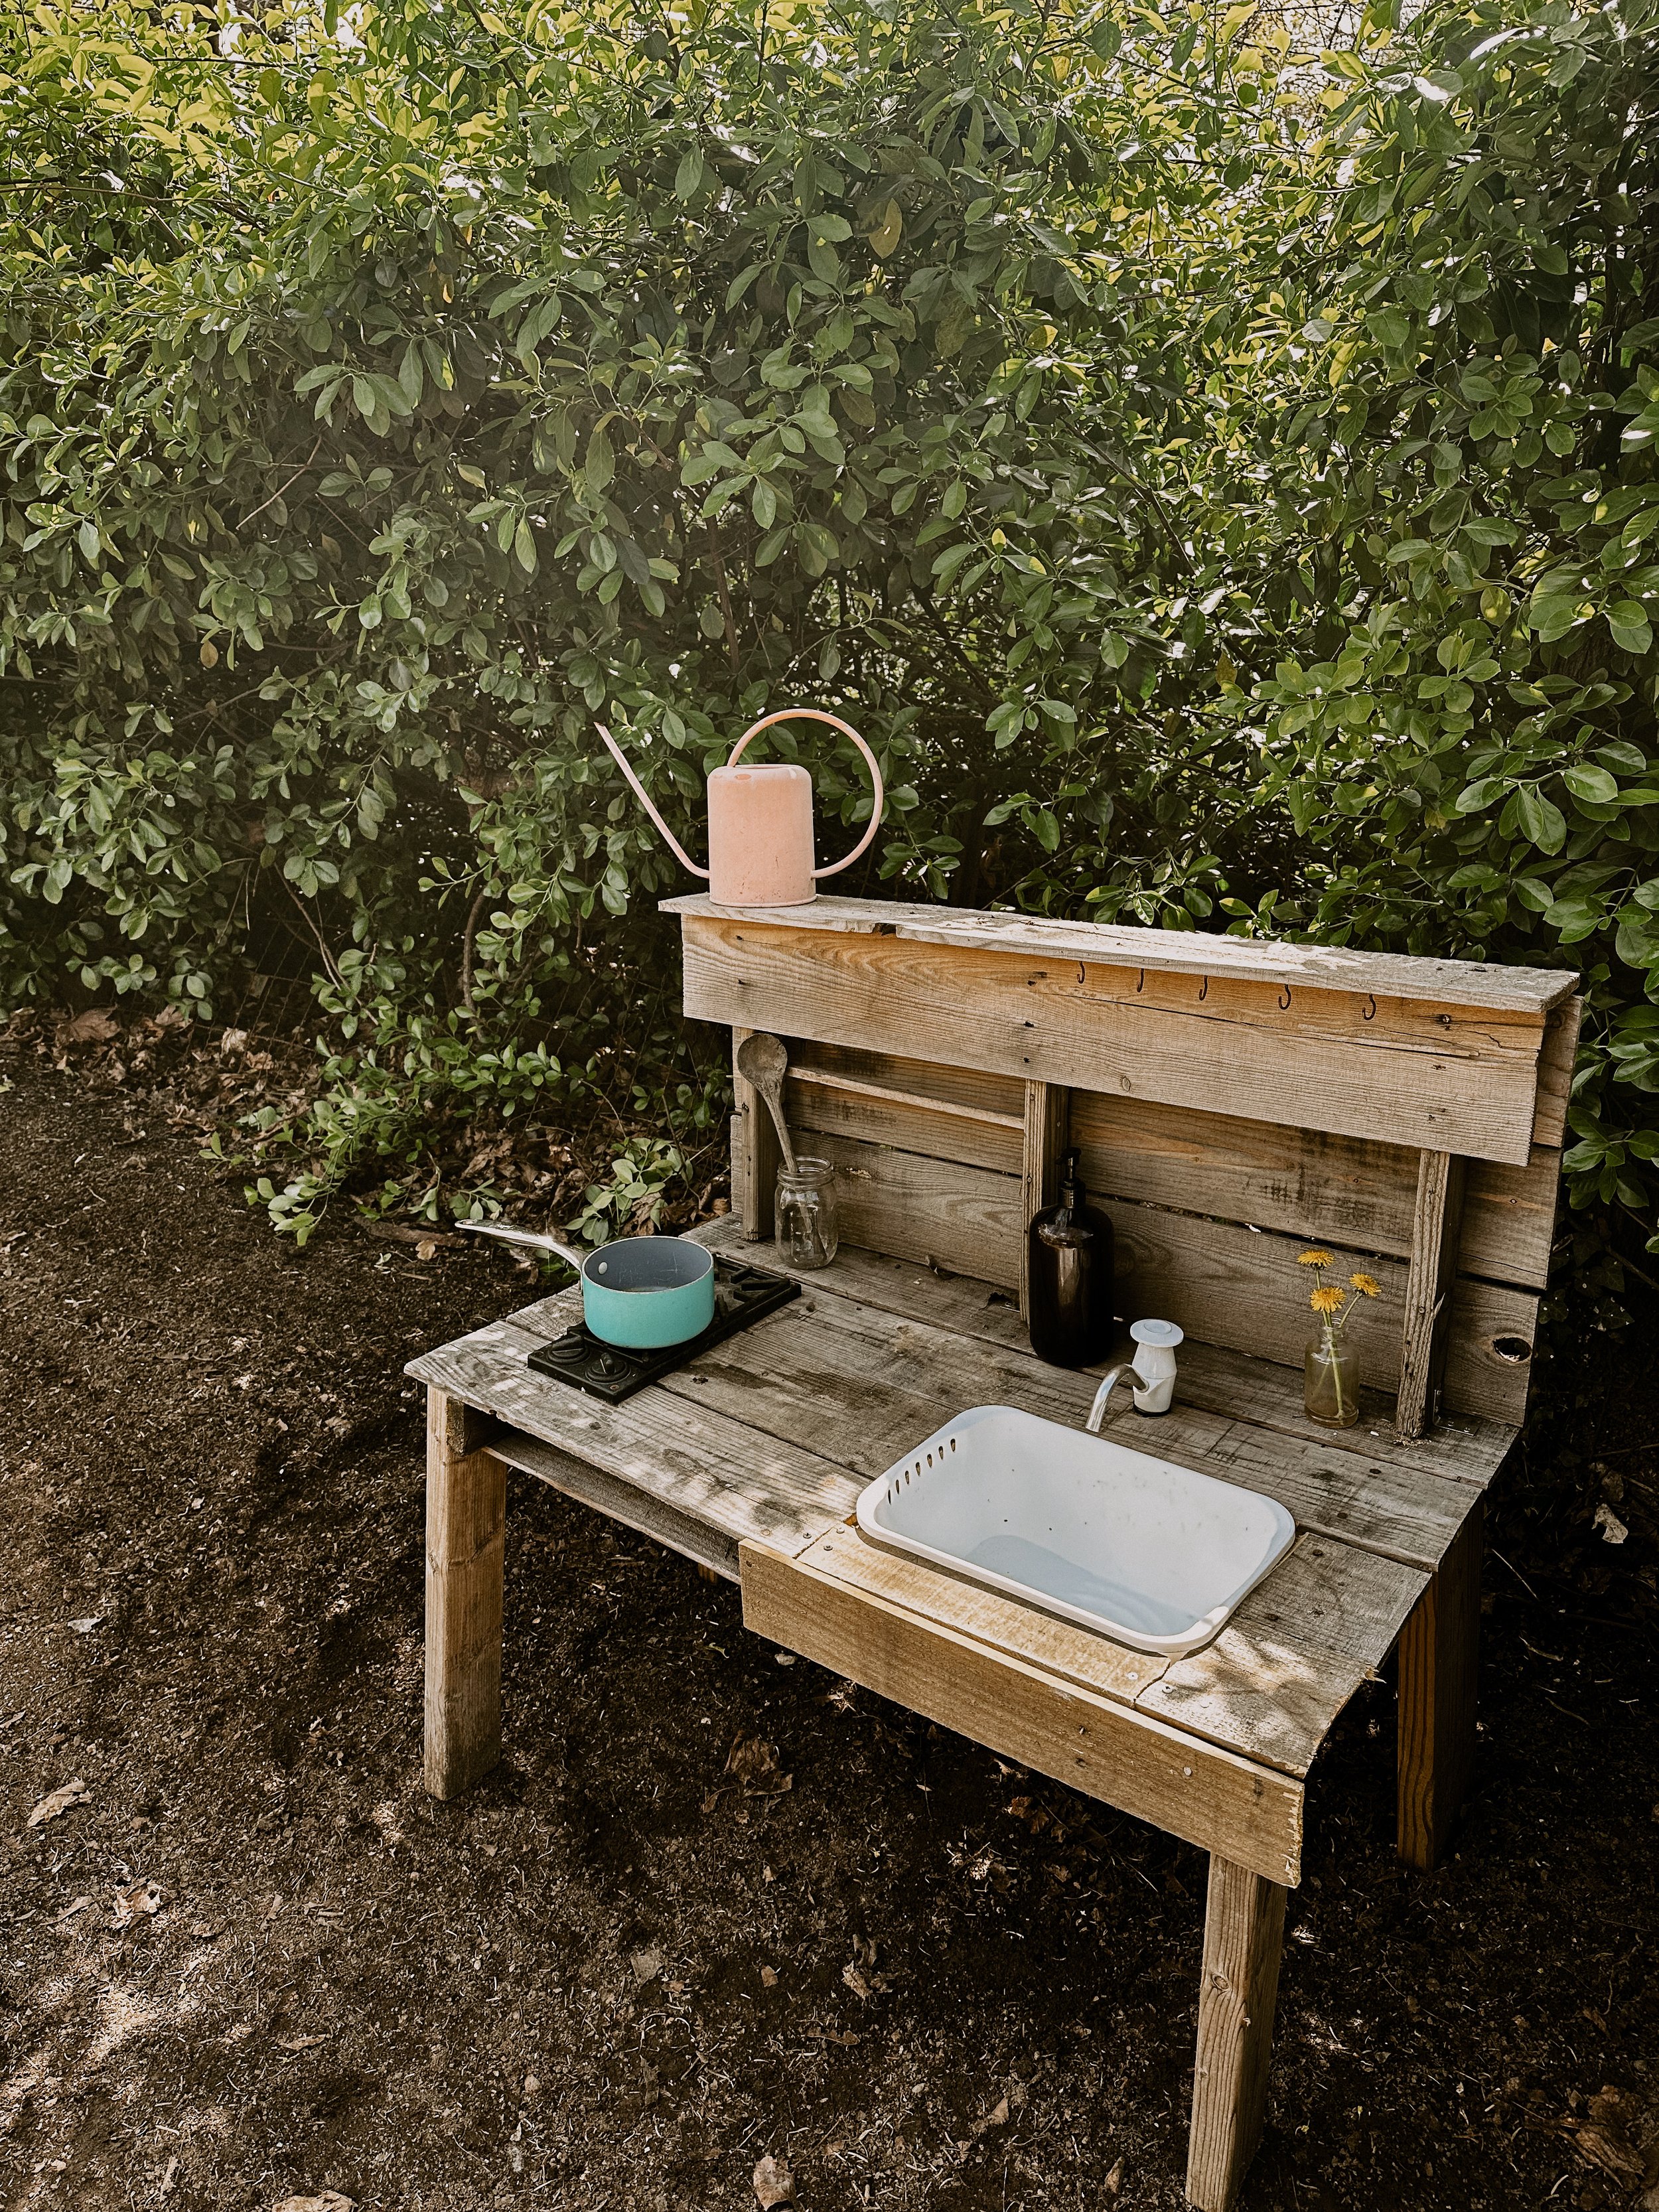
How you want to set up the water pump is up to you, I’m sure my kids would be entertained for hours with the pump on top of the jug but I wanted to secure it to the mud kitchen to make it look a little more real. The pump has a screw cap which goes beneath the kitchen countertop to hold it in place.
Using a drill bit, I drilled a hole large enough for the tubing and pump and ran it through to the water jug beneath the countertop. After fitting it through the hole, I rested the pump on the top of the mud kitchen while screwing the cap on the underside of the table. The tubing and bottom of the pump fits right on top of the 5 gallon jug filled with water. The height of my mud kitchen table makes this a seamless fit. So simple!
After you have figured out the positioning, you can cut the tubing to fit the water jug.
To create the space for the sink basin, measure the sink basin by resting it on the top of the table and outlining the base with a pencil. Then use a jigsaw to create a cut into the table top. I didn’t have a jigsaw and the saw I used broke the already weak pallet boards. Its ok though! I like the rustic woodsy look of our mud kitchen and our kids LOVE it.
Put the sink basin into place, the lip of the basin should rest right on top of the table.
And now “just add water”.
Refill the water jug/receptacle as needed and have a ton of fun!